13: Refining The Design
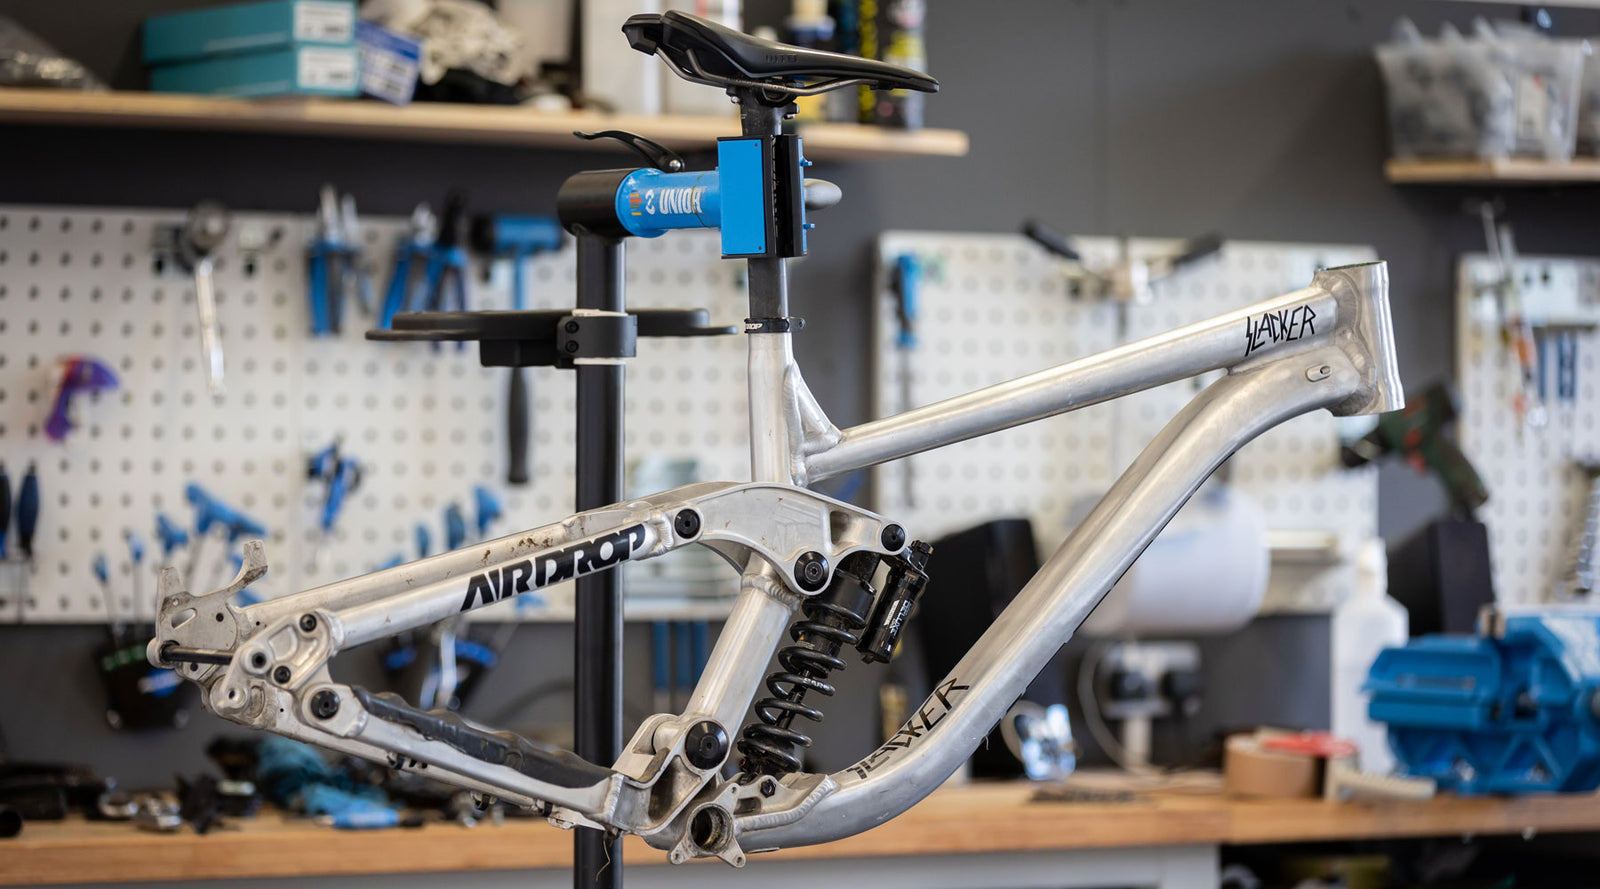
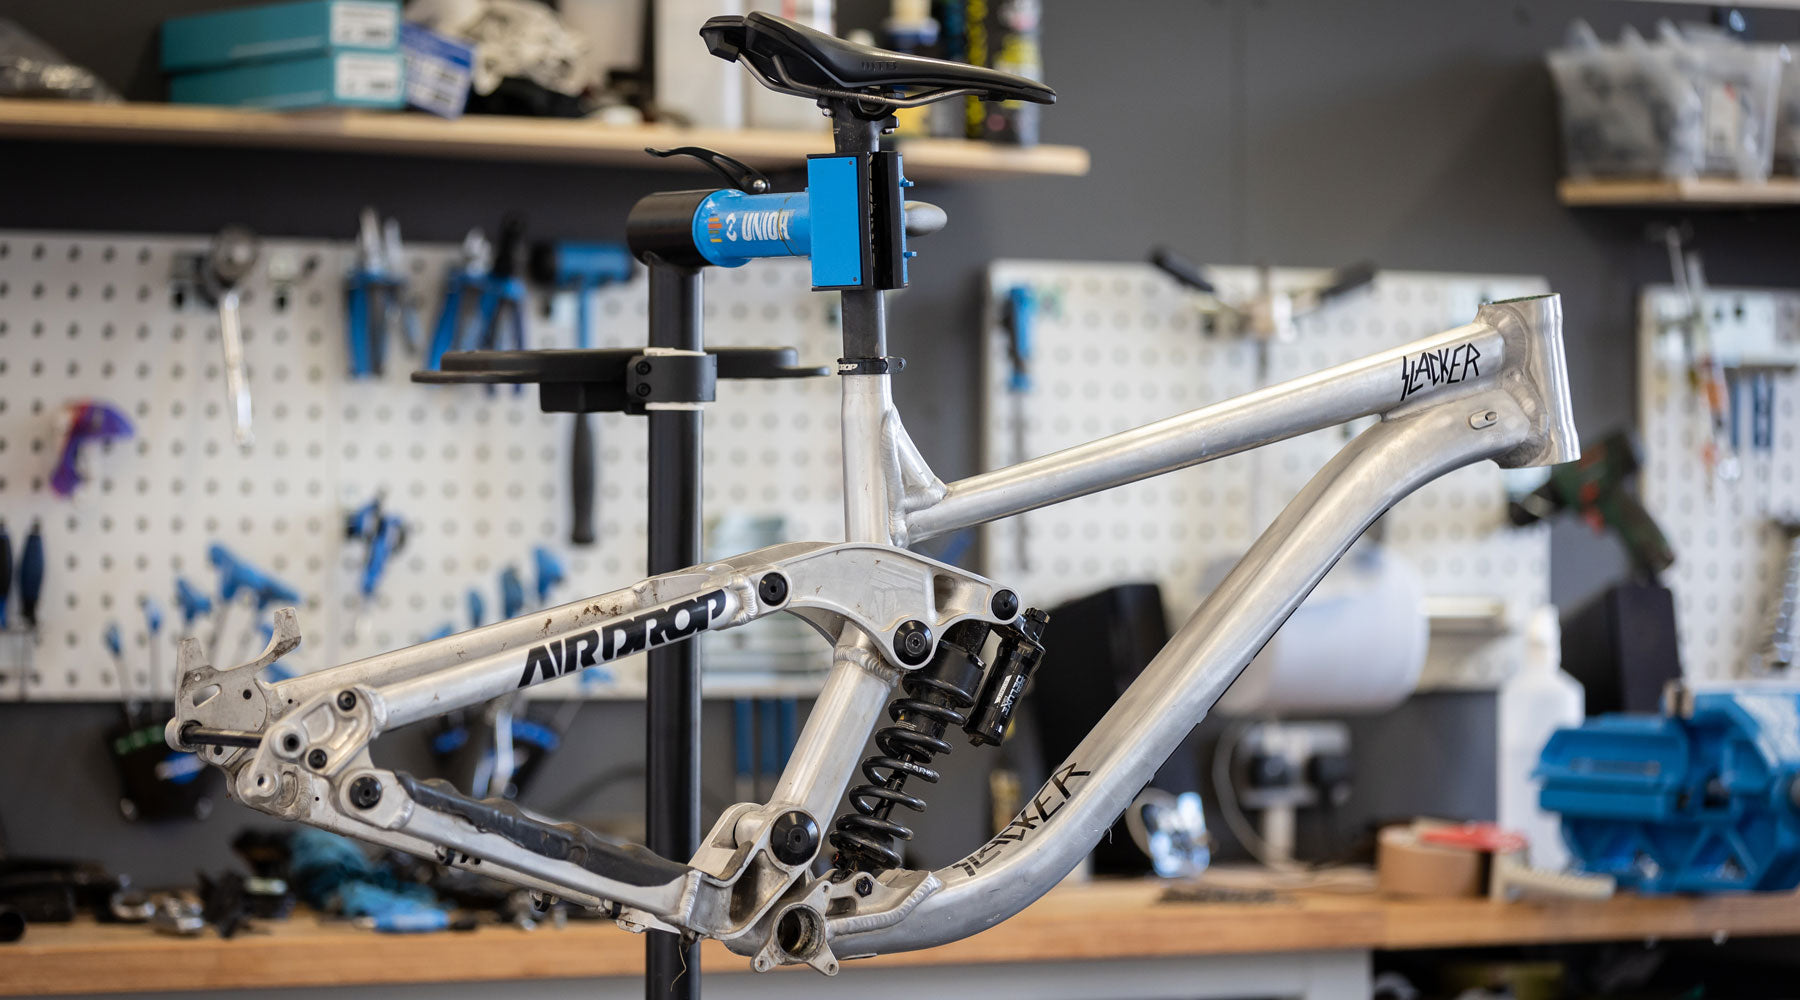
We've been riding the Slacker prototypes for nearly 18 months now. It's time to evaluate everything we've learned and roll that up into another round of developments. This might be the last big push before production.
Before we get into the details, let's just acknowledge that the last couple of years haven't exactly gone to plan. When we started this project around Christmas 2019 we thought it was crazy then, any maybe impossible. That was a couple of weeks before Brexit and three or four months before Lockdown One. There have been times since then when we didn't even know if Airdrop had a future, never mind the Slacker Project. But we stuck with it and we're glad we did, because things are looking up...
What's Changing?
If you've been following the project you'll know that rider testing went well, maybe even better than expected. In terms of performance and handling we were very happy with both the geometry and kinematics. However, we did learn that having two sizes was just too much of a limitation, and that frame weight needed to come down. Having lived with and worked on the bikes for over a year, we also think some changes to the pivot hardware will make maintenance easier and we want to make some subtle changes to the layout.
Essentially, the testing has shifted our perspective from "can we make a downhill bike?" to a place where we're now asking "how can we make this as good as possible?" and we know the answers. That's big progress. But we still can't take any shortcuts: everything needs to be prototyped and tested.

Sizing
Originally we designed the Slacker with just two sizes; a short (440mm reach) and long (470mm reach) size, with an integrated reach-adjust headset to allow fine-tuning by 5mm in each direction. Although the reach-adjust feature was a success, we found the two base-sizes to be too limiting. Although we were pretty happy with the 470mm size, the 440mm frame missed the mark. It wasn't quite right for smaller riders but at the same time average (male) riders at 5'10" found themselves in between the two sizes.
This was a dilemma. The two-size plan was hatched to make the Slacker a little more affordable and that imperative is still very much in place. We might be increasingly confident in the design but the Slacker Project remains a passion project and it still doesn't make much commercial sense. However, if a thing's worth doing, it's worth doing right. So we made the tough call to move to three sizes; 430mm, 455mm and 475mm:

| Size | S1 | S2 | S3 | |
|---|---|---|---|---|
| A | Reach | 430 | 455 | 475 |
| B | Seat Tube | 410 | ||
| C | Top Tube (effective) | 561.5 | 588.7 | 610.4 |
| D | Chainstay | 435 | ||
| E | Head Tube | 110 | 115 | 120 |
| F | Head Angle | 63° | ||
| G | Seat Angle | 69° | ||
| H | Bottom Bracket Drop | -12 | ||
| I | Wheelbase | 1211.4 | 1238.7 | 1261 |
| J | Fork Length | 582 | ||
| K | Fork Offset | 36 |
Combined with our reach adjust headset this gives a total reach range of 425-480mm and should allow us to easily cater for riders from 5'3" up to 6'4". The more tightly packed size increments all share the same seat-tube length of 410mm, which means that riders will genuinely have the choice of reach without compromising elsewhere. That's one of the key advantages of the Slacker being a genuine DH bike and not a 'super enduro' bike that where the pedalling position is a major consideration.
We're moving away from calling the sizes Small, Medium and Large, because that's not what they are. They're just different reach dimensions which anyone can choose to run. So for now let's call them S1, S2 and S3.
Size S1 with a reach range of 425/430/435mm is aimed at riders from 5'3" to 5'9". Feedback from testing showed that 440mm was too much for this group, so out aim with S1 is to better cater for shorter riders. One of our key aims with the Slacker Project is to provide a well-rounded option for junior riders which the new S1 size will help with. And although our frames are not gender-specific, 70% of female riders fall into the 5'2" to 5'7" bracket we expect this to be a more popular size amongst female riders too.
Size S2 with a reach range of 450/455/460mm is just a 15mm jump up from S1 and is aimed at riders from 5'6" to 6' (note there is overlap between sizes). This should work well for average male riders at 5'10" and is likely to be the most popular size with 70% of male riders falling between 5'7" and 6'1".
Size S3 with a reach range of 470/475/480mm is just a 10mm jump up from S2 and is aimed at riders 5'10" to 6'4". Despite being happy with the 470mm reach size we had originally prototyped, it made sense to increase the reach by 5mm to better serve both taller riders and those with a preference for a longer front-centre. We were conscious not to increase the reach too much as we believe that an overly long front-centre (and wheelbase) really detracts from the intended ride characteristic of a park bike. Park bikes should always be about fun and putting the rider in charge rather than flat-out speed.
Tubeset
We're confident in the calls we have made on geometry, which means the geo for the next round of samples will be what we're planning to carry through into production. Although the Slacker needs to go on a diet, we think we can hit our weight target by re-profiling all the CNC parts (more on that later) so we don't need to compromise on tube butting or wall thicknesses. We also fully understand all the fixed points and clearances, which means we can commit to the tubeset. This is a critical step for production readiness as tubing is now on a 210-day lead time (it was 70 days pre-Covid).
As a very small brand producing frames in small batches, we have to really keep an eye on tooling costs; opening our own tooling could be $5,000 - $10,000 per tube so we could easily spank $40,000 on tube tooling alone. Managing these costs helps to make sure we can get the Slacker into production and ultimately bring it to market at a reasonable price. With this in mind we're using a mixture of existing hydro-formed and mechanically extruded tubes.
The main challenge with the Slacker was the down-tube. At the best of times it can be a challenge to get enough clearance for a vertically mounted piggyback shock, but our decision to mount it as low as possible in the frame made this even harder. On the smaller sizes which steeper tube-angles, this was a real headache. This is probably why big companies would just spend the $10,000 and tool-up for a tube to solve the problem. Without the cash, we have to be creative. The solution was a bit of good-old fashioned mechanical tube forming at the down-tube to BB weld.

Weight
Straight out of the box it was clear that the original prototypes were a bit on the heavy side. Surprisingly this didn't come back as feedback through rider testing, but it remains something we want to improve and we think we can. We have to remember those first prototypes were only intended as a proof-of-concept and they certainly achieved that. A production-ready design needs to be significantly more refined. We put a lot of time into re-designing and refining almost all of the CNC work on the frame.
All told, we managed to shave 509g off the total frame weight and we expect production frames to come in at 4.2 - 4.4kg depending on size and finish.
UDH Dropouts
We're big fans of SRAM's new(ish) UDH dropout standard and developing the Slacker presented the perfect opportunity to develop our own compatible solution. Essentially, UDH is a standardised mech hanger that's being adopted by a number of brands. It's a simple but effective design and it means sourcing spares for customers should be both cheaper and easier in future. It also has the potential to enable drivetrain manufacturers to develop new components around the standard.

Our current dropout design, originally developed for the Edit v1, uses both a removable mech hanger droupout and brake mount dropout tied together with our own CNC rear axle. It's a good system and has many practical benefits but after 5 years we now feel that we can improve it. The UDH standard presented an opportunity to design a cleaner brake-side dropout with the mount more closely integrated into the tube, and also bring in clearance for a 220mm rotor.

The new design has also allowed us to improve the integration of the chainstay pivot into the dropout yoke as well as continue the line of the tubing into the yoke for a much cleaner aesthetic. We've beefed up the bearing to a 6902 which has a higher load capacity, and we've gone to a larger diameter on the pivot hardware. We've managed to save 85g over the previous design.
Seat-Stay Brace
The original seat-stay brace presented a few opportunities for improvement. When assembled, this part shares a lot of the load with the one-piece rocker so we could easily reduce the amount of material required here. For the new version we changed the chamfer profile on the edges to reduce the flat-surface area, pocketed the brace and also reduced the overall thickness. That's a weight saving of just 27g but aesthetically it's a significant improvement.

One-Piece Rocker
Having learned a lot through the development of the one-piece rocker for the Edit v4, it was obvious that we could remove a lot of material in this area. I'm not sure really what we were thinking when we did the original drawings for the Slacker, but to say the rocker was overbuilt would be an understatement. The original rocker alone weighed in at 560g. We reduced the overall wall thickness and the shoulders, revised the pocketing. We actually increased the diameter of the rocker pivot and axle (more on this later) but even with that, we were able to save 217g to give an overall rocker weight of 343g (for context the Edit rocker is 290g).

Seat-Tube Pivot Housing
As we don't need to worry about seatpost insertion depth for the Slacker, we have opted to go with a CNC pivot housing that's designed to fit inside both the lower and upper seat-tube. This joint overlap makes the area extremely strong. We designed the CNC pivot housing to seamless transition between the square-profiled lower seat-tube to the round profiled upper tube.

We increased the pivot diameter here too, from 15mm to 20mm which both increased stiffness and with revised pocketing, saved a further 24g.
Drillium
Now that we've committed to the tubeset we were able to rework the drilling in the areas where CNC parts are welded to the tubing. The purpose of these holes is the remove and excess material internal to the frame, and to vent the joint, preventing gases from building up inside during welding. For the original prototypes we jsut specified simple round holes but we were able to optimise these and save a few grammes here and there. All these small refinements across the fame add up.
Pivot Hardware
In spite of heavy use in some disgusting weather, we haven't had to reassemble the frames all that much. But we still felt that we could improve some of the fine detail which would lead to more durability in the pivots and bearings as well as making the Slacker easier to work on.
A park bike should be able to withstand the punishment that repeated bike-park laps dish out, without needing regular maintenance. So bearing load capacity and longevity are areas we've paid particular attention to. We've also looked at improving the ease of assembly and the hardware's ability to resist unsympathetic treatment.
Pivot Axles
The original Slacker prototypes used a 15mm diameter axle at the at the rocker pivot and a 20mm diameter axle at the BB pivot. Both employed 2x stainless steel bolts and 2x top-hat washers so 5x individual pieces per pivot.
We've moved to 20mm and 25mm diameter axles for greater strength and stiffness. We've also simplified the hardware to a two-piece design which means fewer potential points of failure and much easier assembly with 6mm and 8mm hex-key fittings. Both axles now use 7075 alloy and are anodised for maximum durability.
Bearings
To us it's important for bearings to last an acceptable period of time in all conditions but also that when they do wear out, replacements are easy to source. We've never used a proprietary bearing in an Airdrop bike. With that mind the all the pivot bearings on the Slacker or either 6900 or 6800 series.
Spacers
We all know how frustrating it can be to disassemble a frame. All those washers but only two hands. With this in mind we've made the move to top-hat style washers that sit inside the bearing inner-race to make reassembly much easier. All pivot spacers are CNC machined from 7075 alloy and anodised to ensure the fit is exact and parts are resistant to corrosion.
What Happens Now?
We've been a bit cheeky with this. We actually did all this work and ordered samples a few months ago. They're on their way to us right now, and might even be here this week. The Slacker Project is no longer a pipe dream... it's becoming a reality.
If we've done a good job of these samples, we'll be in a position to sign off on production. And you know what that means - customers will be cutting laps on Slackers next Summer. Bring it on. There are still some challenges, not least figuring out how we're going to pay for everything. But we've come this far with your support, and with your support we can continue.
We'll put up another post as soon as those samples are here.
The Big Picture
If you've been following The Slacker Project, you might be thinking this is taking ages. You're right, it is. This is how long it takes, if you want to get a bike right. Not to mention the Pandemic and all the challenges that has thrown our way. Part of the project is sharing the ups and downs so you can all understand what goes into these bikes.
Understandably though some people are asking when the Slacker will be available to buy, and we have some good news! We're expecting production samples any day. All being well we can then pull the trigger on full production...

4 Responses


Leave a comment
Comments will be approved before showing up.
Nate
August 17, 2022
Love that raw aluminum! Great looking frame! Would love to get my hands on one!